How to Flatten or Stretch Hardware Cloth

There are many examples of how to build a chicken run out there just here's how nosotros built ours from scratch! Beginning of all….remember what the depot looked like when nosotros first got information technology? I never would have imagined we'd turn information technology into a chicken coop, garden shed and chicken run:

After nosotros finished the craven coop renovation of the depot , we started building the chicken run. We started correct upwardly against the chicken coop, starting time moving the clay effectually to make it as flat as we could. The first big step was laying out a large rectangle expanse and setting the 4 posts. We used the same technique every bit the garden fence to ensure our rectangle had xc degree angles.

We set the posts just like we did in our fence post tutorial here .

The hardware cloth we used for the run was 36″ across so nosotros set the interior posts and then the centers measured 36″ apart to minimize how much wire cutting we would have to exercise.

The posts were held in place with fleck wood. We e'er use iii″ Hillman deck screws because they are easy to screw and out:

I'll repeat that last tip: use Hillman deck screws ! There is no demand to pre-drill and you can drill ane-handed because they volition drive themselves in. We get together structures within minutes using these:

To keep any animals from excavation into the run nosotros lined the entire flooring with chicken wire. The easiest manner to cut craven wire or hardware material is with Stanley tin can snips ! They cut simply similar scissors:
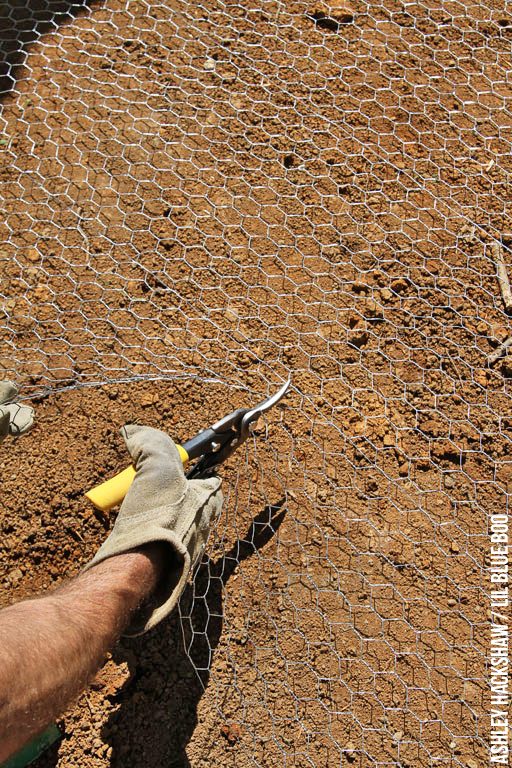
The chicken wire was cutting effectually the posts and kept in place with landscaping staples on the outside:
We added 2×4's in between each of the posts:

The adjacent stride was calculation the hardware material to the run. I ordered big 36″ wide by fifty foot rolls of hardware cloth direct from the manufacturer hither .

Nosotros cut long strips of hardware fabric and fastened them using fence staples:

Regular staples are too hands pulled out by a predator so I used iii/iv″ poultry net staples every few inches:

The easiest way to attach hardware material is to blast information technology in the eye and work upwards and downwards from there, stretching as we go:

Tip: Have one person pull the hardware cloth with a screw driver and the other person blast information technology into place. Wear gloves!
 hardware cloth")
We continued attached the hardware cloth all the way around the run:

After all the hardware cloth was in place we added 12×12 pressure level treated boards to the bottom of the run:
(Note near the rocks: We were going to encompass the bottom of the run with these flat rocks we had from an old patio, but I decided that the run would drain better without them if needed and I took them out at the end.)

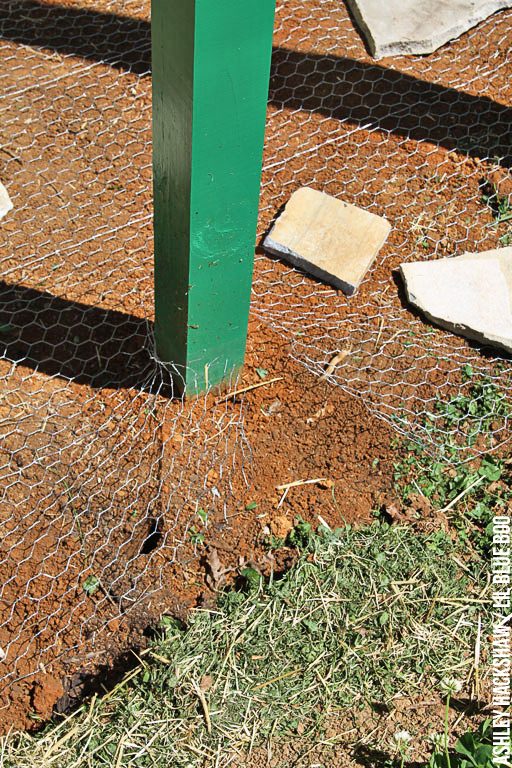
The hardware cloth comes out most 12″ to 18″ inches and volition be covered past dirt to discourage predators from digging from the exterior too. I used mural staples nailed into the dirt to keep information technology in place.

And if they did dig they wouldn't be able to get through the chicken wire on the lesser of the coop. You tin can run into how we still had to build the run on a slope here. The 12″ boards helped to brand upwardly that divergence:

We put large railroad ties in the front end of the coop as a step and to concord down the wire in the front. That's pretty lavander I planted earlier nosotros were even finished:

8″ boards were added at the top of the coop to keep all the vertical posts in place. Then we added the roof joists, just drilling the in at an angle. Hurricane ties will be added later. Slats were added to the top of the roof joists to keep them in place, and to have wood for the roof to exist attached to:

Flashing was added where the run met the coop to proceed rainwater from flowing in between the two. We had some extra drip edge laying effectually so we added that to the front:

You can see the finished slats here:

Whatever additional

We used old reclaimed tin for the roof. It was free from a neighbour! Y'all tin also find reclaimed tin on Craigslist.

Boo and I handed Brett one slice of tin at a fourth dimension as he worked to speed up the process:

Every niggling hole up at the roof was covered with hardware wire to continue predators out:

An easy way to bend hardware textile at a crisp xc degree bending is to place information technology betwixt two pieces of wood and hammer information technology into place:

Oh the doors! They were assembled from 2x4s:

I painted the doors commencement, before adding the hardware cloth. Information technology was so squeamish having the huge rolls of hardware fabric! I could be so liberal with information technology:

A finished door:

Each door has an exterior latch and a handle:

The inside of each door has a piece of wood to continue it from swinging through, and also makes it more secure. In that location'southward also an inside claw that I can close when I'm within the coop:

I of the well-nigh exciting parts of the project was cutting the coop door! Brett drilled holes from inside the coop to mark where the door needed to be cut:

Cut the hole with the saw. Let there be low-cal!

The primitive door:

The door was framed in with some bit wood:

And painted:

Boo's project was to make the ramps. It was a slap-up manner for her to utilize her math skills in real life:

She's pretty handy with a drill these days:

Painting the ramp:

We added a door and a latch so that the coop can be locked at night:

The ramp hangs from hooks and is hands removed for cleaning:

A very important addition: hanging flowers. Simply brand certain the flowers you option aren't toxic to chickens if they are able to get close enough to them to swallow.

All the stone that I took from the inside of the coop I used equally a walkway to the coop and around the back:
Whatever additional holes were covered with hardware cloth or wood:

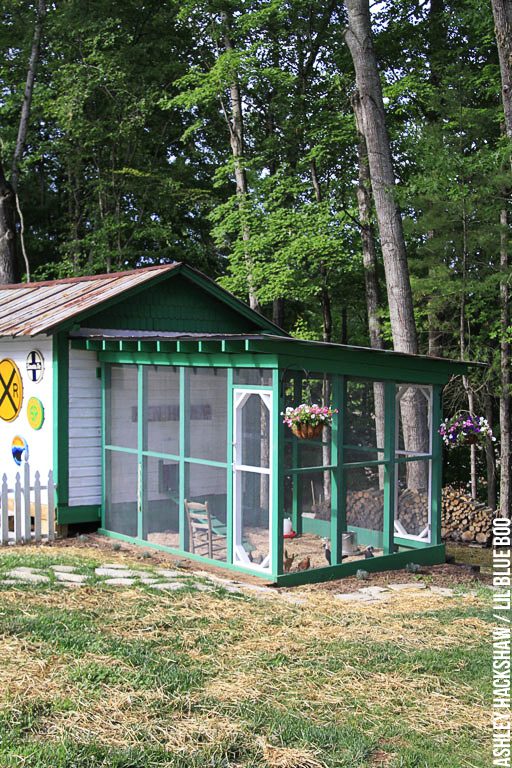
The finished chicken run:

I made the "Hen House" sign in virtually 5 minutes using an old slice of wood, a can or blackness spray pigment, and some 8″ sign stencils :

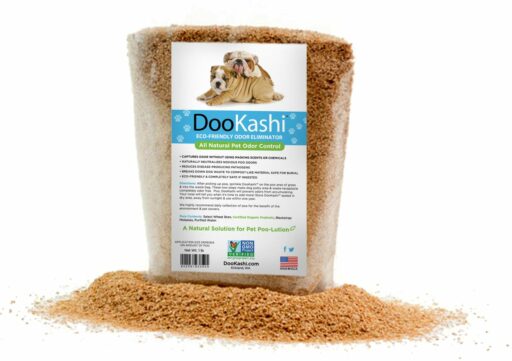
The craven run floor is a mixture of pine shavings, dirt, and mulch. I wanted something clean and natural. The floor is sloped slightly for drainage in case at that place is always as well much water runoff. I sprinkle Dookashi around to keep information technology fresh and add the shavings from the coop each time I clean it out. Dookashi:
Nosotros added two doors to the run so that information technology would be easy for cleaning. The back door is but a short distance from our large compost bin surface area …you lot tin see information technology merely off in the distance behind it:

The chicks love their run! Each morning they are waiting at the door to be let out…and of course every night they line back up to head back into their cozy coop :

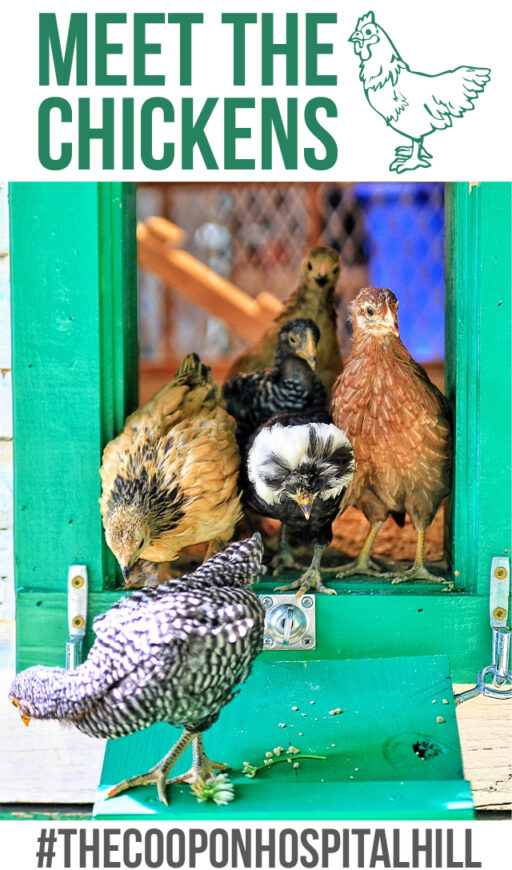
You can meet all of our chicks here or at the link beneath!
All of our chicken coop and train depot projects tin be found organized here including:
Converting a Shed to a Craven Coop
Building Nesting Boxes
Inside the Chicken Coop (Roosting Bars, Poop Boards, Feeders Etc)
0 Response to "How to Flatten or Stretch Hardware Cloth"
Post a Comment